Shooting Water Drops by Craig J Hadfield
I have had many people ask how I shot my water drop shots
so here is a simple guide how to do it.
I have always been fascinated by Macro -Photography, and
water splashes especially. I think they can make wonderful images, with
textures, tones and curves.
I recently bought a new lens for my camera, a 150mm macro
lens. With the new lens mounted on the front of my camera, I decided it was time
to try my hand at these wonderful water splashes I had been seeing.
I got a 10 inch green plastic bowl and put
about 3 inches of water in it. I mounted my camera on a tripod. Placed a large
reversible reflector 12 inches behind the bowl and then mounted my flashgun off
to the right of the camera with a hot shoe cable. The flash was pointed at the
reflector, rather than directly at the bowl, so any flash was reflected light.
I then suspended a plastic bag of water about 3
feet above the surface of the bowl. I then made a single pin hole in the bag and
got a steady stream of drops.
Focus – Focusing on the exact spot that the
drops were landing was tricky, and I was using manual focus. I finally decided I
needed something to get amore exact focus. I took a wooden skewer and push a
bobble headed pin into it.
I then held this until the water drops were hitting it
exactly at the surface of the water, I then manually focused on the pin head.
I used a cable release once I was focused, and
watched the drips without having to look through the view finder. After while
you get a sense of timing and know when to release the shutter.
With a 150mm focal length macro lens I was able
to have a working distance of around 3 feet for these drops, so the camera was
safely out reach of the water splashes.
Coloring: The water drops can be colored in a
few different ways, the ones I have seen or read about are:
Gel Packs, put colored gels over the flash heads. (haven’t
tried this.)
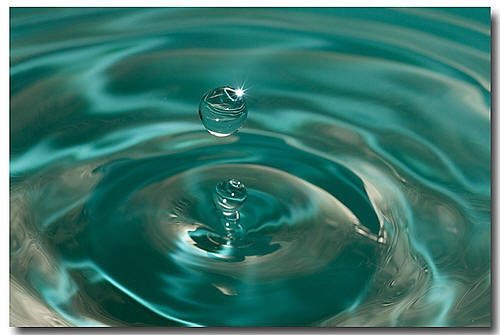
Colored Reflectors – you can use colored cards to bounce
the light back onto the flash, the picture top right shows
The green plastic bowl, but with gold highlights from my
gold reflector.
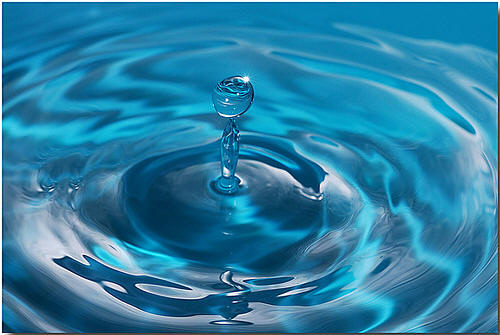
Camera White Balance – The pale blue splash is the same
green bowl, this time with a silver reflector and setting the camera white
balance to Tungsten light. The camera changes the hue as it is expecting the
image to be very yellow from tungsten lighting and give a much different result
from the normal WB setting.
I shot the pictures in RAW and manual mode on
the camera. I set the camera as fast as the flash would allow me, 1/250th on my
50D.
Settings:
Fully Manual, F9 to F11, 1/250th, ISO 100
Equipment:
50D, Sigma 150mm F2.8 Macro lens and Canon 580 EXII
Tripod
Reflector
Have fun trying, I shot just over 200 images in
about 3 hours.
back